Building an Ionic App with Protected/Private Content
This is a guest post from Dayana Jabif, Ionic Insider and co-founder of Ionic Themes and Angular Templates. where she helps build great UI templates for developers to get started with. Dayana writes often about what you can do with Ionic, Angular, and Firebase.
Images, audios, videos, text documents, pdfs, you name it. Files are part of our everyday life so learning how to handle them in our applications is a crucial task. In this tutorial, you will learn how to upload and download images to firebase storage from an Ionic app. We will explain how to handle both public and protected files. There were many use cases that came to my mind while writing this tutorial, for example: a learning app with public and private content where private content is only available upon subscription. Although this guide is about Firebase Storage, it’s important to mention that there are many other storage options available, such as Amazon s3.
Cloud Storage for Firebase is built for app developers who need to store and serve user-generated content, such as photos or videos. Files can be either public or protected using security rules to determine who has access to them. Firebase Storage can be used for any type of files, but in this tutorial we will focus on images.
We included examples of both cases: a section with public files visible to everyone and a private section, only accessible through authentication, where files are restricted. This means that just the logged user can access them.
Depending on your app needs, Firebase allows you to create your own security rules to allow read and write access to any file or group of files. We will see how to work with Firebase security rules for different use cases.
Capturing, uploading, listing, and deleting image files with Ionic is a typical task inside many applications. In this post, you will learn how to create an Ionic Angular app to handle both public and private images.
This app will work both inside the browser and as a native iOS and Android app. This is thanks to Ionic Capacitor because it provides APIs that work similarly across the different platforms!
So, without further introduction, let’s see some screenshots of the app we are going to build for this tutorial. It has two tabs, one for public content and the other one for private content with an authentication form. You can also download all the source code.


Create an Ionic App
We start by creating a new Ionic Angular tabs app with Capacitor.
Then, we install the Camera capacitor plugin and also PWA elements to be able to use the camera API from the desktop browser.
# create new ionic app
ionic start ionic-firebase-storage-tutorial tabs --type=angular --capacitor
cd ./ionic-firebase-storage-tutorial

# Install capacitor plugins
npm install @capacitor/camera

# Add PWA elements for desktop support
npm install @ionic/pwa-elements

# Add native platforms
ionic build
PWA Elements
Ionic Capacitor fully supports traditional web and Progressive Web Apps. Some Capacitor plugins, such as Camera, have web-based UI available when not running natively. For example, calling Camera.getPhoto() will load a responsive photo-taking experience when running on the web.
This UI is implemented using web components. Due to the magic of Shadow DOM, these components should not conflict with your own UI. These components are called PWA elements.
After installing @ionic/pwa-elements we need to import the element loader and call it at the correct time. For this Ionic Angular application, we will call the element loader after the platform has been bootstrapped in our main.ts file.
import { enableProdMode } from '@angular/core';
import { platformBrowserDynamic } from '@angular/platform-browser-dynamic';

import { AppModule } from './app/app.module';
import { environment } from './environments/environment';

import { defineCustomElements } from '@ionic/pwa-elements/loader';

if (environment.production) {
  enableProdMode();
}

platformBrowserDynamic()
  .bootstrapModule(AppModule)
  .catch((err) => console.log(err));

// Call the element loader after the platform has been bootstrapped
defineCustomElements(window);
Asking the user for permissions
Our Ionic camera app will use the Camera API which provides the ability to take a photo with the camera or choose an existing image from the photo album. Because of privacy issues, the user is asked for certain permissions before accessing their camera or photos.
iOS requires the following usage description to be added and filled out for your app in ios/App/App/Info.plist
<key>NSCameraUsageDescription</key>
<string>Privacy - Camera Usage Description</string>
<key>NSPhotoLibraryAddUsageDescription</key>
<string>Privacy - Photo Library Additions Usage Description</string>
<key>NSPhotoLibraryUsageDescription</key>
<string>Privacy - Photo Library Usage Description</string>
You can add these lines at the end of the file before the closing tag. Please make sure to add the correct string descriptions.
For android project, this API requires the following permissions to be added to your android/app/src/main/AndroidManifest.xml
<uses-permission android:name="android.permission.READ_EXTERNAL_STORAGE"/>
<uses-permission android:name="android.permission.WRITE_EXTERNAL_STORAGE"/>
You can add these lines at the end of the file before the </manifest> closing tag.
Firebase Integration
To connect your Ionic app with Firebase, we will use AngularFire. AngularFire is the official Angular library for Firebase. Basically, it’s a library that provides an easy way for Angular developers to use the framework-agnostic Firebase JS SDK.
To install the AngularFire library, run the following command from your console:
ng add @angular/fire
This command will install @angular/fire and firebase libraries. It will also allow you to select a Firebase project to link to your app.
Firebase 9
This tutorial uses the latest version of the Firebase SDK (currently is version 9). This SDK introduces a modular approach that provides reduced SDK size and greater efficiency with modern JavaScript build tools.
Version 9 integrates well with build tools that strip out code that isn’t being used in your app, a process known as “tree-shaking.” Apps built with this SDK benefit from greatly-reduced size footprints. Read more about the new Firebase sdk.
Our project will use Firebase Storage and Firebase Authentication. In this Ionic Firebase tutorial we will not use Firebase Database, however, we have recently published another post where we carefully explain how to integrate a Firebase Database to an Ionic app.
Add Firebase to your Ionic App
In order to use the tools provided by firebase, we need to create a Firebase project from the Firebase console.
I will not go into details about creating the Firebase project, but if you need guidance doing it check add firebase to your ionic app.
To create your project, log in to your firebase account and follow the steps to create a new project. Then, access your new project dashboard and click on “Add Firebase to your web app” to see the credentials of your new Firebase application. We need these credentials to connect our Ionic and firebase projects.
Now, add these credentials to the src/environment/environment.ts file from your Ionic Angular project.
Well done! Now we need to initialize the AngularFire library. To do this, go to your AppModule and add the provideFirebaseApp and provideFirestore imports.
@NgModule({
  declarations: [AppComponent],
  imports: [
    BrowserModule,
    IonicModule.forRoot(),
    AppRoutingModule,
    provideFirebaseApp(() => initializeApp(environment.firebase)),
    provideStorage(() => getStorage()),
    // Auth guards are not yet implemented in the new AngularFire so we need to load them from the 'old' modules
    // Issue: https://github.com/angular/angularfire/issues/2986#
    AngularFireModule.initializeApp(environment.firebase),
    AngularFireAuthModule,
    // Firebase auth needs to be initialized manually on iOS because the default getAuth() function assumes you're in a browser context and automatically includes web code that causes errors in iOS.
    // Issue https://github.com/firebase/firebase-js-sdk/issues/5019#issuecomment-861761505
    provideAuth(() => whichAuth),
  ],
  providers: [{ provide: RouteReuseStrategy, useClass: IonicRouteStrategy }],
  bootstrap: [AppComponent],
})
export class AppModule {}
Some important notes here:
Auth guards are not yet implemented in the new modular version of AngularFire so we need to load them from the ‘old’ modules.
There is an open Issue about using Firebase Auth with Capacitor 3. We need to initialize Firebase auth manually because the default getAuth() function assumes you’re in a browser context and automatically includes web code that causes errors in iOS.
For this reason, we created a function that depending on the platform (native or not) initializes the auth module differently.
This is particularly important if you plan to build your app for iOS and Android by using Ionic Capacitor.
Load Public Content from Storage
In the first tab, we will be loading image files from Firebase Storage that don’t have security rules. This means that they are available for everybody.

In this view we have 2 different streams of data: Posts and Friends. Let’s see how to pull these images from Firebase Storage and display them in our Ionic app with a nice UI and UX.
First, we need to create the folder structure in Cloud Storage and upload some files. We can do this from the firebase console.
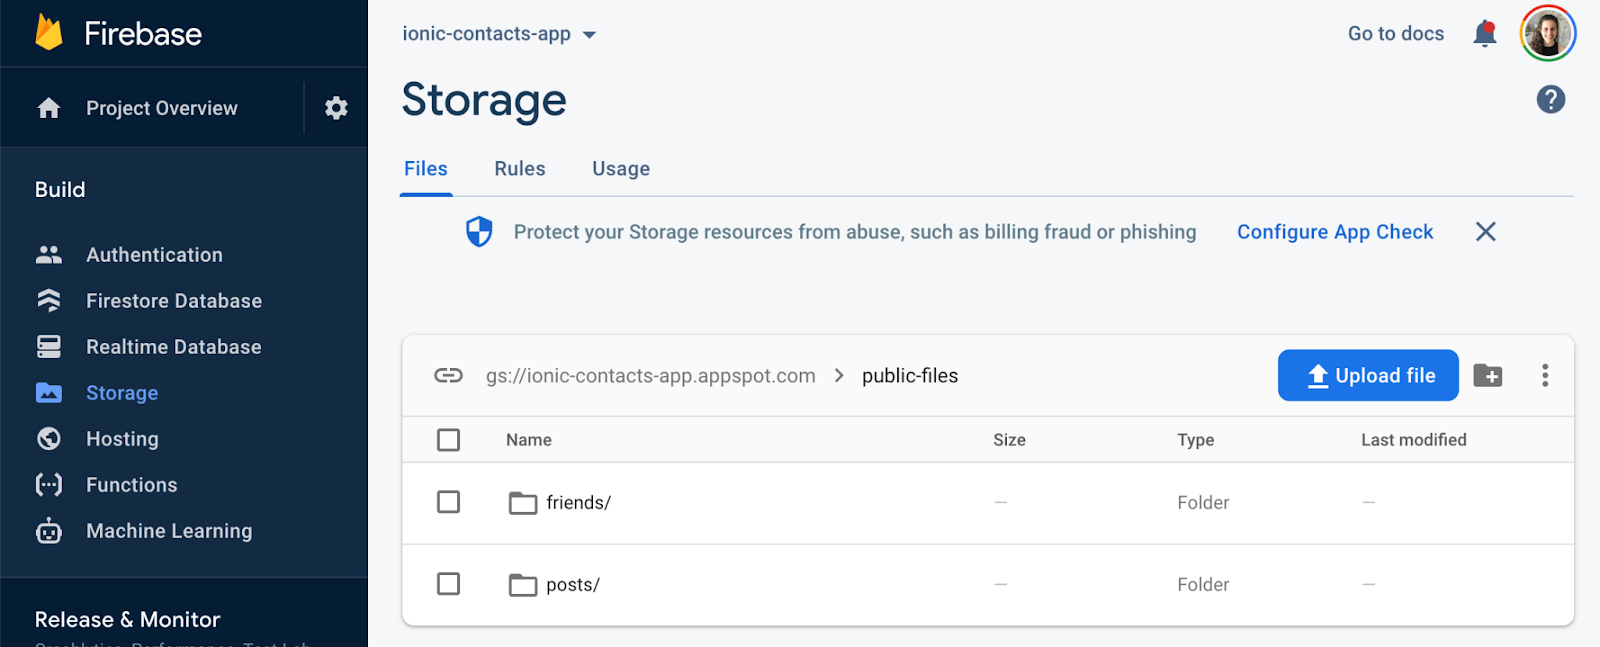

Then, in our Ionic app, we created a Service src/app/utils/services/data.service.ts that has all the code needed to communicate with Firebase.
In order to upload or download files, delete files, or get or update metadata to the Storage, you need to create a reference to the file you want to operate on. A reference can be thought of as a pointer to a file in the cloud.
Let’s see a code example. To get the post images we will use the following code:
public getPostsImagesDataSource(): Observable<ImageListingModel> {
    return this.getImages('public-files/posts');
  }

  private getImages(bucketPath: string): Observable<ImageListingModel> {
    // Get a reference to the storage service, which is used to create references in your storage bucket
    const storage = getStorage();

    // Create a storage reference from our storage service
    const storageRef = ref(storage);

    // Points to our firestorage folder with path bucketPath
    const folderRef = ref(storageRef, bucketPath);

    return from(this.getDownloadURLs(folderRef))
    .pipe(
      map(urls => {
        const model = new ImageListingModel();
        model.imagesUrls = urls;
        return model;
      })
    );
  }
The getImages() function will return a list of our ImageListingModel which is basically a model with a list of imageUrls.
A bit about navigation best practices
For this app, and for almost every app we build, we use Angular Resolvers and Shell Components.
Angular Route Resolvers enable us to avoid displaying a blank component while waiting for the data to load, which translates in a better user experience and perceived performance.
If we weren’t to use angular route resolvers, we would have to wait until the route gets activated to fetch the data from the server and consequently displaying critical information for that page slower.
Route resolvers also allow you to handle errors before navigating to the component. There’s no point in navigating to a product details page if that product ID doesn’t have a record on the database. It’d be better to send the user back to the Products Listing page and show him a proper error message.
An application shell (or app shell) architecture is one way to build a Progressive Web App that reliably and instantly loads on your users’ screens, similar to what you see in native apps.
The shell is the minimal CSS, HTML and JavaScript required to power the user interface and when cached offline can ensure instant, reliably good performance to users.
The main goal of the app shell is to improve our app’s perceived performance.
In our App Shell solution we have two important things: DataStore and DataSource.
DataSource is a simple Observable to get your data.
DataStore has a Subject (named timeline) which holds a reference to the state emitted by the DataSource.It has a mechanism to append a Shell (empty model with skeleton components) before the DataSource emits the real data.State management can become a tough task thus why we rely heavily on rxjs to handle the states. Learn more about our App Shell solution and how to add it to your Ionic App.
Going back to our example, from our Tab1Page we load the result of this call and display the images in a simple grid.
The same applies for the Friends images.
public getFriendsImagesDataSource(): Observable<ImageListingModel> {
  return this.getImages('public-files/friends');
}
I created an example with two different streams of data to show you how to handle two different and independent data sources in the same page. Each of them will display shell components until the real data arrives.
Well, that was all for listing the public content using App Shell components. Easy, right? If you have any questions about this, or about the UI, please leave me a question at the comments section from the bottom of the page.
Private Content
Using Firebase security rules we can restrict access to specific content only for certain users.
Firebase Security Rules for Cloud Storage integrates with Firebase Authentication to provide powerful user based authentication to Cloud Storage. This allows for granular access control based on claims of a Firebase Authentication token.
To create the security rules for your application go to the Firebase Console => Storage and navigate to the Rules tab.

Here you can write any rules you need. In our project we have two different rules, one for public files and another one for the private files.
When an authenticated user performs a request against Cloud Storage, the request.auth variable is populated with the user’s uid (request.auth.uid). When an unauthenticated user performs a request, the request.auth variable is null.
Using this data, there are several common ways to use authentication to secure files:
- Public: ignore request.auth
- Authenticated private: check that request.auth is not null
- User private: check that request.auth.uid equals a path uid
- Group private: check the custom token’s claims to match a chosen claim, or read the file metadata to see if a metadata field exists
By far the most common use case for request.auth will be to provide individual users with granular permissions on their files like uploading and reading private images or documents. This is exactly what we are doing in this tutorial.
Since files in Cloud Storage have a full “path” to the file, all it takes to make a file controlled by a user is a piece of unique, user identifying information in the filename prefix (such as the user’s uid) that can be checked when the rule is evaluated.
So, the folder structure we will use to upload the private files will be something like this:
Private-files => {userID} => {fileName}


To implement this use case we first need a log in / sign up form. In this post we are building an Angular Ionic app so for the forms we will be using Angular Forms. We will not get into details about how to create a signup form in Ionic because we have an extensive post about that. However, if you have any questions about the authentication forms, don’t hesitate to ask.
So, in the second tab we have this simple authentication form with an input for the email address and another input for the password. Both inputs have a required validation. This means they can’t be empty. Also, the sign up and sign in buttons are disabled until both inputs are valid.
From this simple form you can perform both sign up and sign in. Ideally you want to have different pages for each operation but, as mentioned before, there is a complete tutorial about ionic forms which also includes examples of input validations and error messages.
In the Tab2Page component, you will find the code that calls the signInToFirebase and signUpToFirebase methods from our DataService.

Firebase Authentication also has a dedicated tutorial in our blog because there are many tips and tricks that you want to know when adding authentication to your ionic capacitor app. For example, if you are building native apps with Capacitor, you need to add some extra configuration. Also, if you want to add social sign in to your Ionic app such as Facebook, Google, Twitter, Apple, and so on, there are some steps you should follow.
I’ve personally created the Ionic Firebase Authentication Tutorial after adding that feature to our Ionic 5 Full Starter Template because I found out it wasn’t a simple task. I’ve spent a lot of time trying and debugging the code understanding how everything works and how to configure each of those apps in order to support a seamless authentication option for all platforms: ios, android and the web.
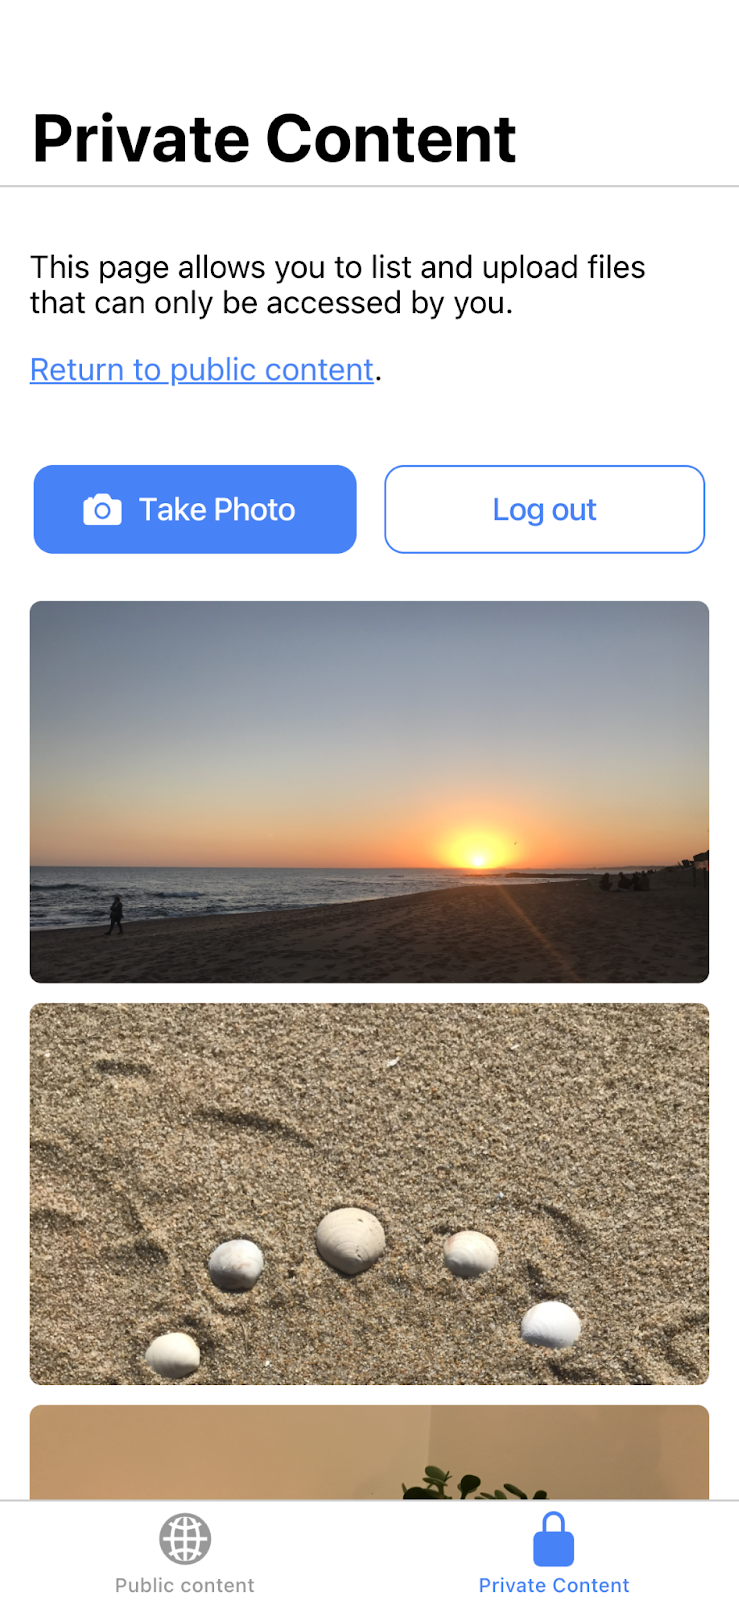
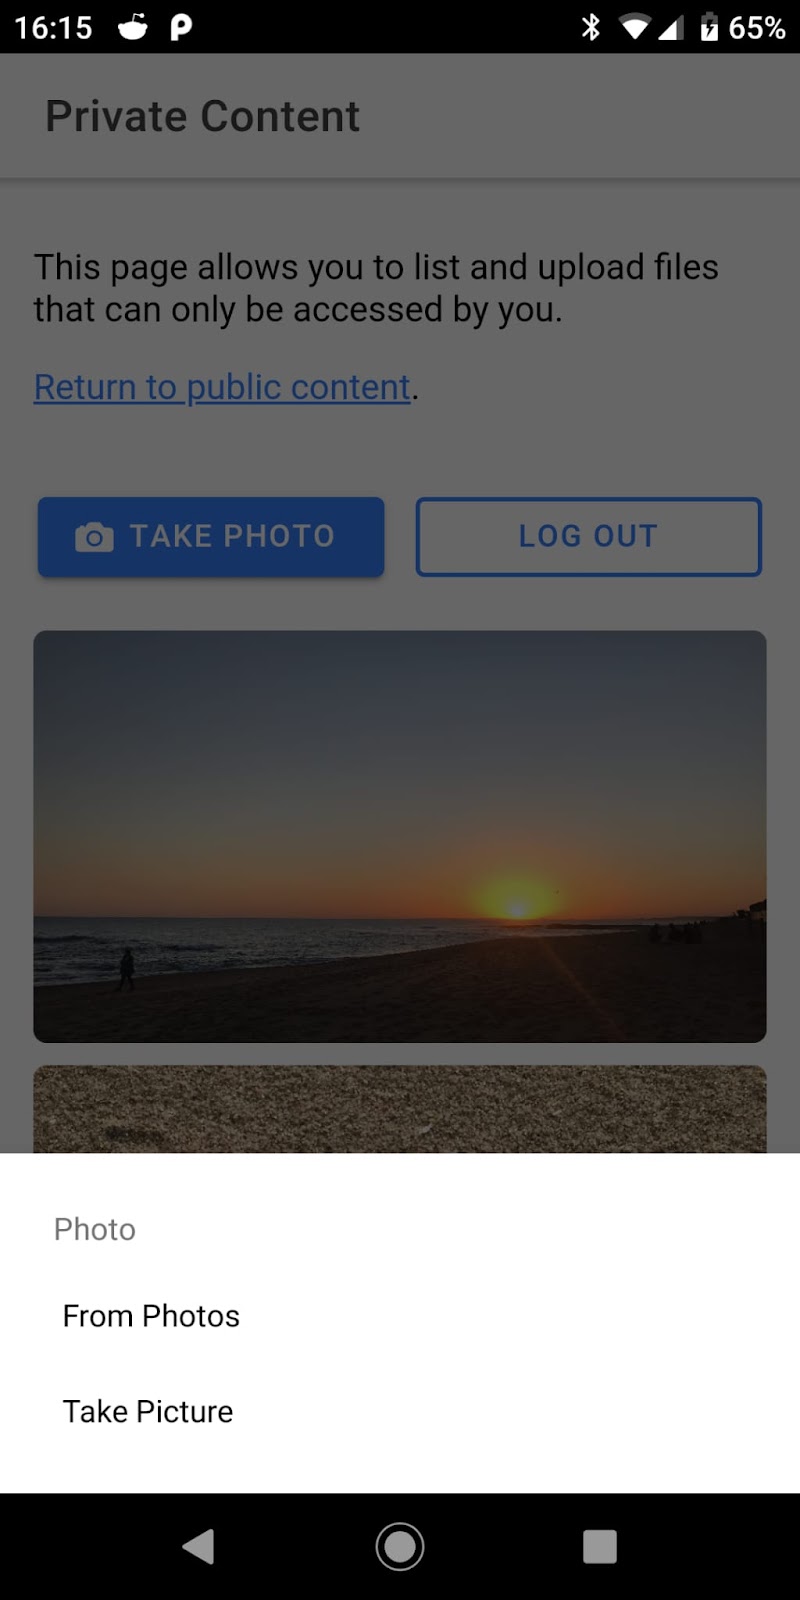
After the user logs in, he is redirected to the PrivateContentPage where he will be able to
- upload a new photo. Take a new one or select one from the image gallery.
- see his previously uploaded photos
- delete any previously uploaded photo
- log out

Ionic Camera – Take a photo
There are many use cases where you need to allow the user to upload an image. The most common example is a Profile page where the user can upload his profile picture. Also if your app has a social component, you will need to provide an option to upload images to share with other users. In this tutorial I will explain how to use the Capacitor Camera API to take a picture or select one from the image gallery. The Camera API works in every platform both native and desktop.
In order to open the camera component from the device we will use the following code. The magic about Capacitor is that it doesn’t matter which platform the app is running on, we can use the same code and the Camera API will handle it.
async openCameraComponent() {
    // Take a photo
    const capturedPhoto = await Camera.getPhoto({
      resultType: CameraResultType.Uri, // file-based data; provides best performance
      source: CameraSource.Prompt, // prompts the user to select either the photo album or take a photo.
      quality: 100 // highest quality (0 to 100)
    });

    const savedImageFile = await this.dataService.savePictureInFirebaseStorage(capturedPhoto);
    this.files.imagesUrls.unshift(savedImageFile);
  }
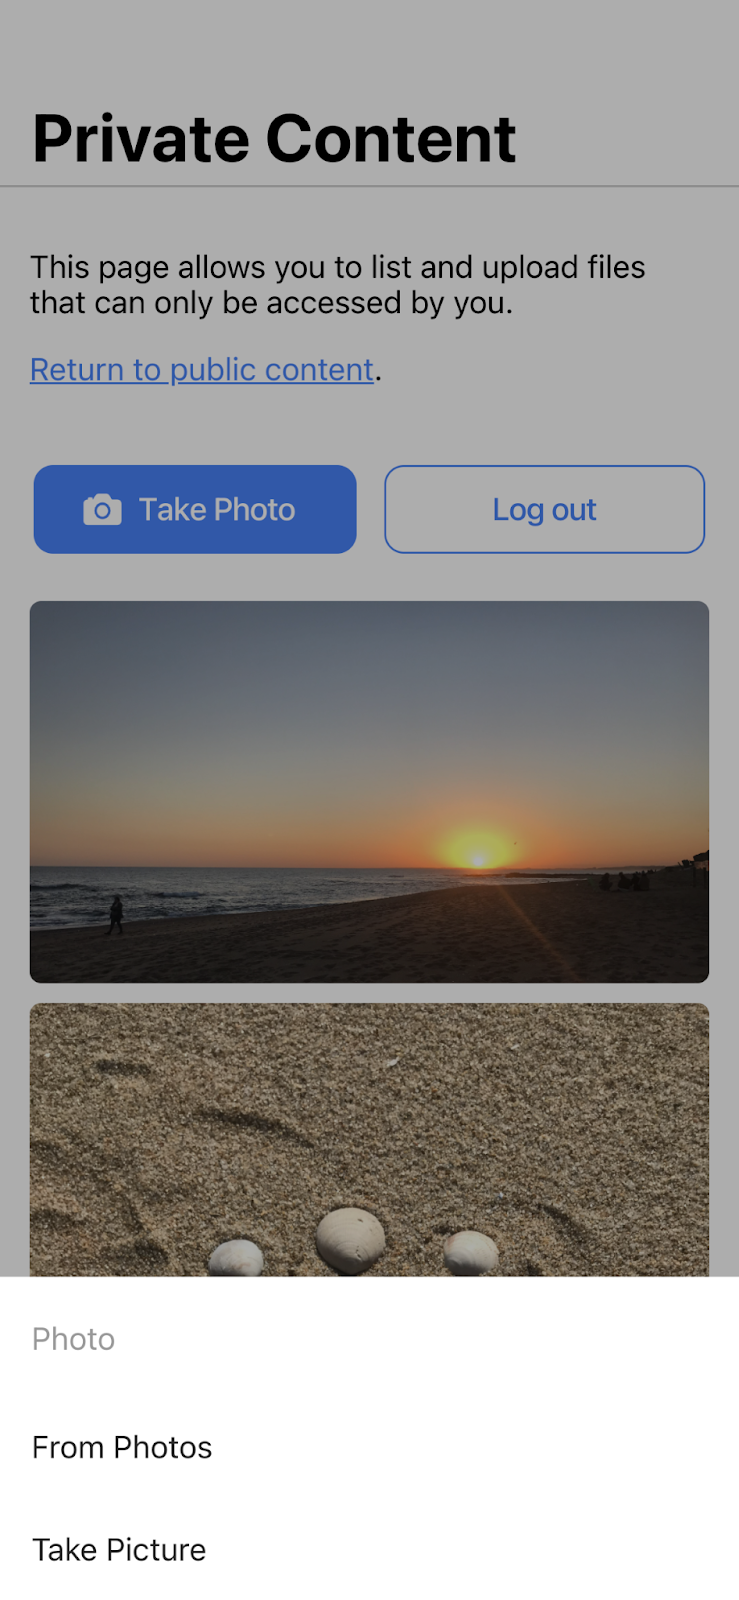
The Camera.getPhoto will prompt the user to pick a photo from an album, or take a new photo with the camera.
The getPhoto method accepts as a parameter an object with some configuration options for the Camera API.
Let’s see how the Camera API behaves on the different platforms:
In the browser:

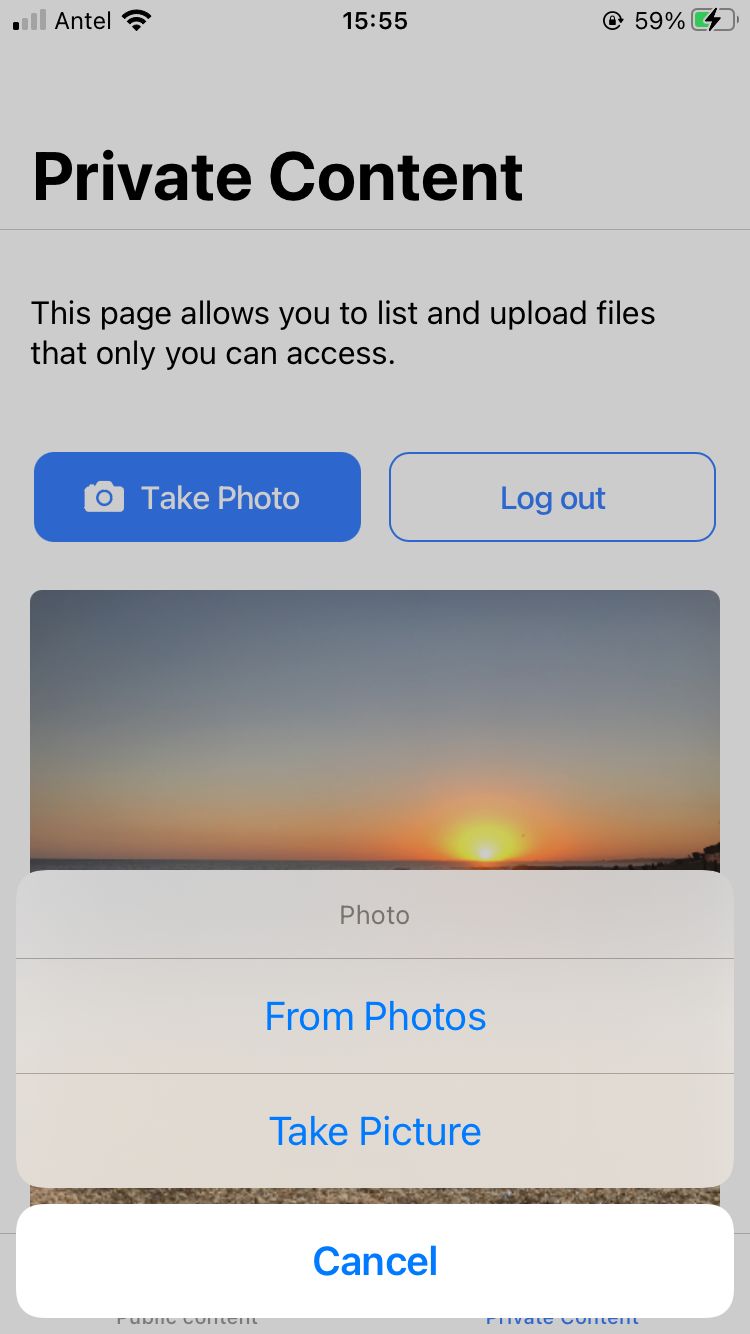
In iOS:

In android:

After we capture the photo, we will upload it to Firebase Storage. Let’s go to our DataService and see the code needed for this.
// Save picture to file on device
 public async savePictureInFirebaseStorage(cameraPhoto: Photo) {

    // Get a reference to the storage service, which is used to create references in your storage bucket
    const storageRef = ref(getStorage());

    // Points to our firestorage folder 'private-files/userID'
    const imagesRef = ref(storageRef, 'private-files/' + this.currentUser.uid);

    // Points to 'tutorial-files/file-name.jpeg'
    const fileName = new Date().getTime() + '.jpeg';
    const spaceRef = ref(imagesRef, fileName);

    let savedFile: UploadResult = await uploadString(spaceRef, cameraPhoto.base64String, 'base64');

    return await getDownloadURL(ref(imagesRef, savedFile?.metadata.name));
  }
Remember you can download all the code of this ionic angular example app.
Delete an Image
After the image is uploaded to the Storage, we list it in the Ionic app by getting the url using the firebase getDownloadURL function.
From the list of images you can Delete one of them by clicking on it.
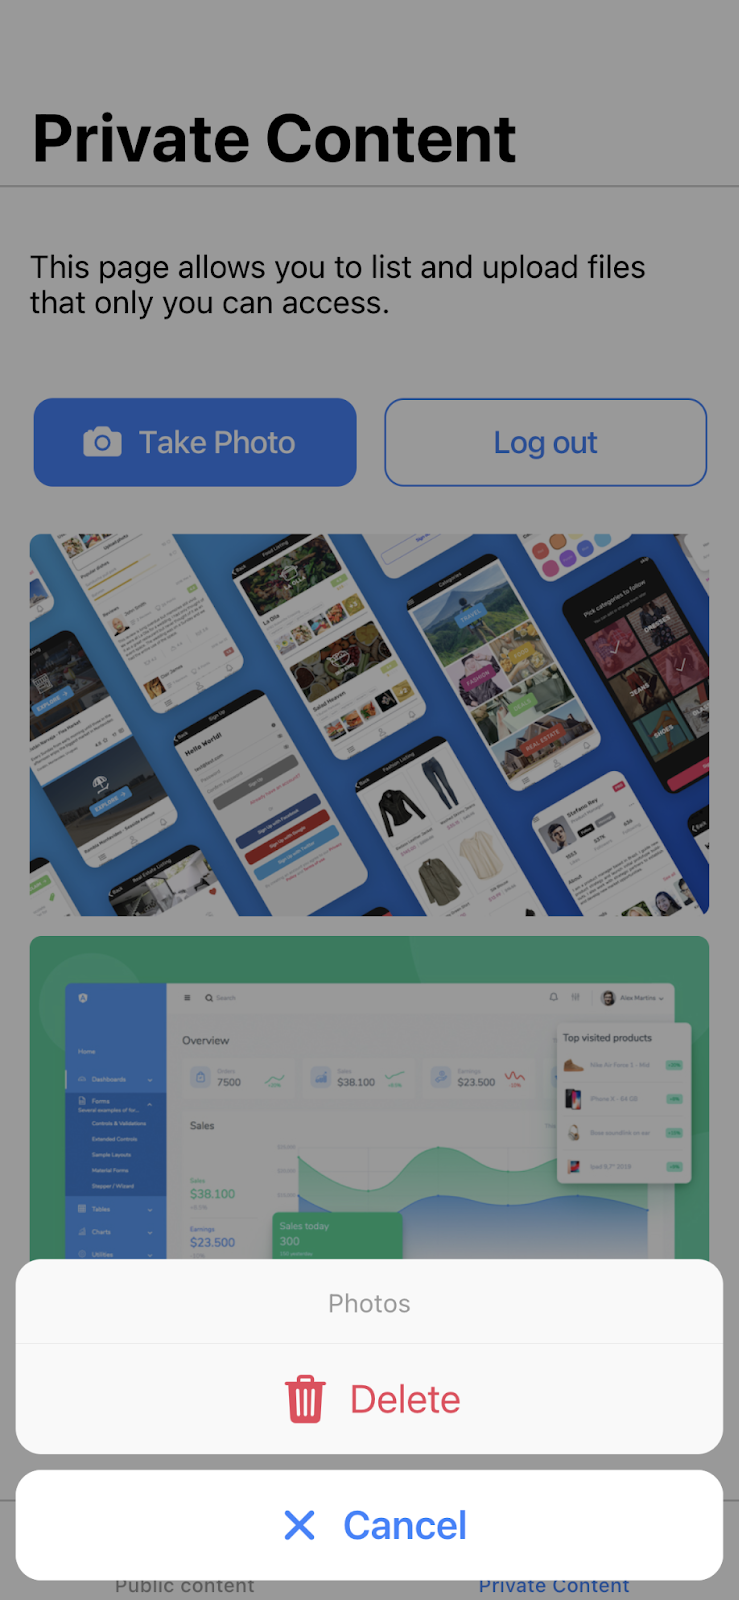
The code related to this function is also in the DataService under the function deletePicture.
Let us know if you have any questions related to this.
Wrapping up
In this ionic angular tutorial we created an app that shows how to use Firebase Storage to upload images.
We discussed the privacy of the files and included different examples so you can see how to use Firebase Storage both for public and private files.
Public files are files that can be accessed by everyone. Private or protected files are files that can only be accessed by certain users. In this post we explained how you can define the access rules depending on your app needs.
Please note that this example is about images but you could use it for any type of file such as pdfs or audios. Any type of media could be uploaded to the Firebase Storage.
Next steps or possible improvements
If you want to improve the UX of this app, these are some of my suggestions:
- Allow the user to crop the selected image before uploading it to the Storage
- Add a loader indicator while the image is uploading. This will give the user the certainty that the file is being uploaded and that everything seems to be ok.
- Add success and error messages to the flow. For example, you could add a success message when the image is uploaded completely.
Hope this ionic angular firebase tutorial was helpful for you. Remember you can get all the source code of this project and please ask me any questions or just let me know your feedback.


