Web Build and Web Previews
Next up, we'll explore web builds and web previews, which allow you to quickly share the web version of your app with your coworkers, stakeholders, and more.
Check out this branch of this tutorial's app repository to compare your starter project and make changes if necessary.
Creating a web build
Now that you have created a new App and have commits visible in your Appflow Dashboard, you can prepare a web build then view it as a web preview. There are two ways to create a web build:
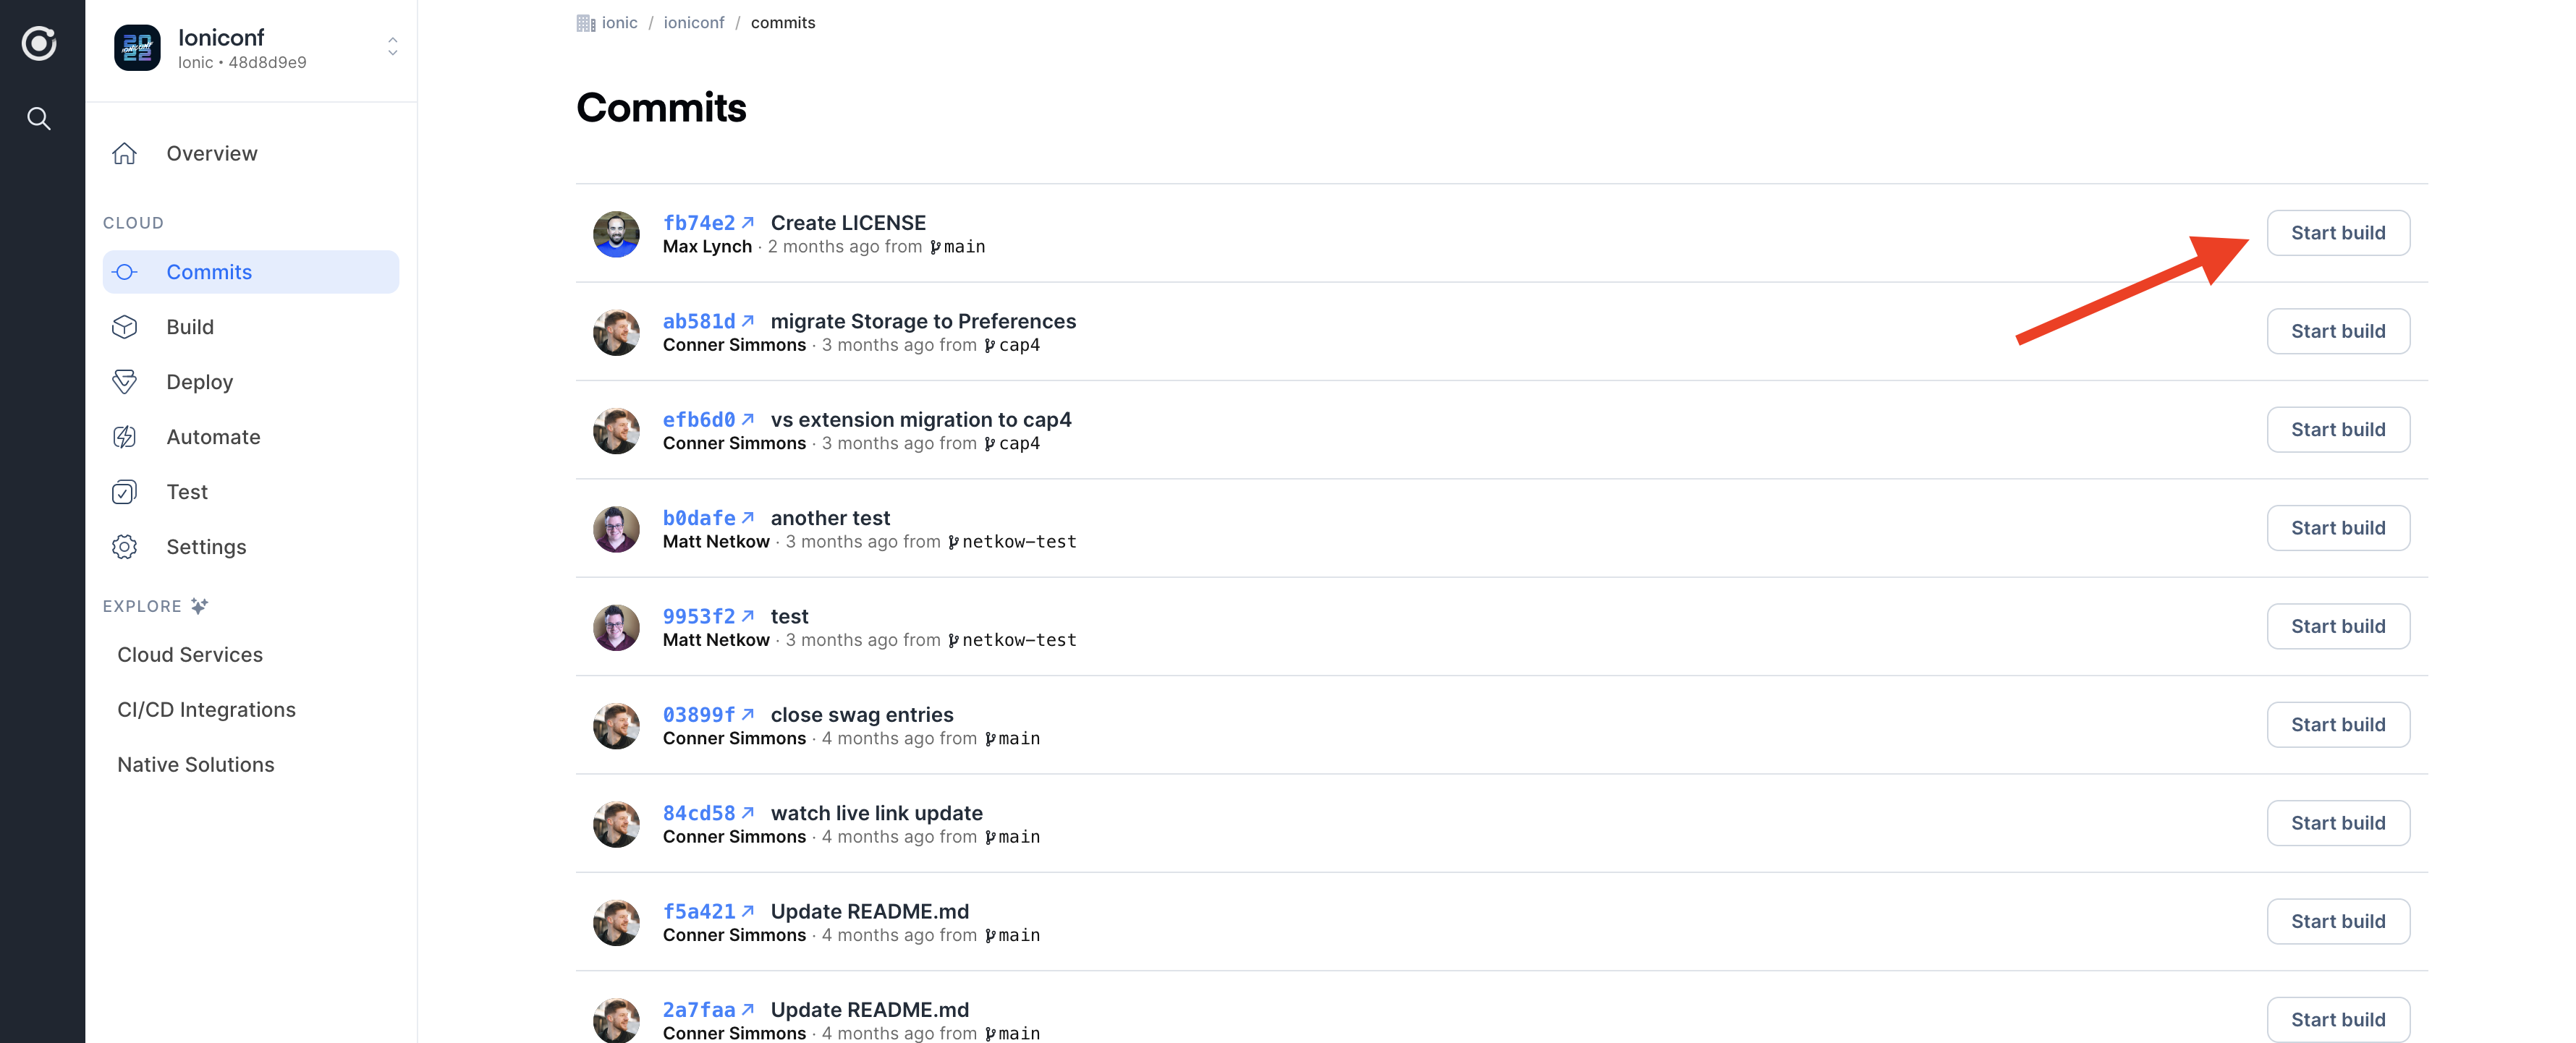
- Click the Start build button from the Commits tab.
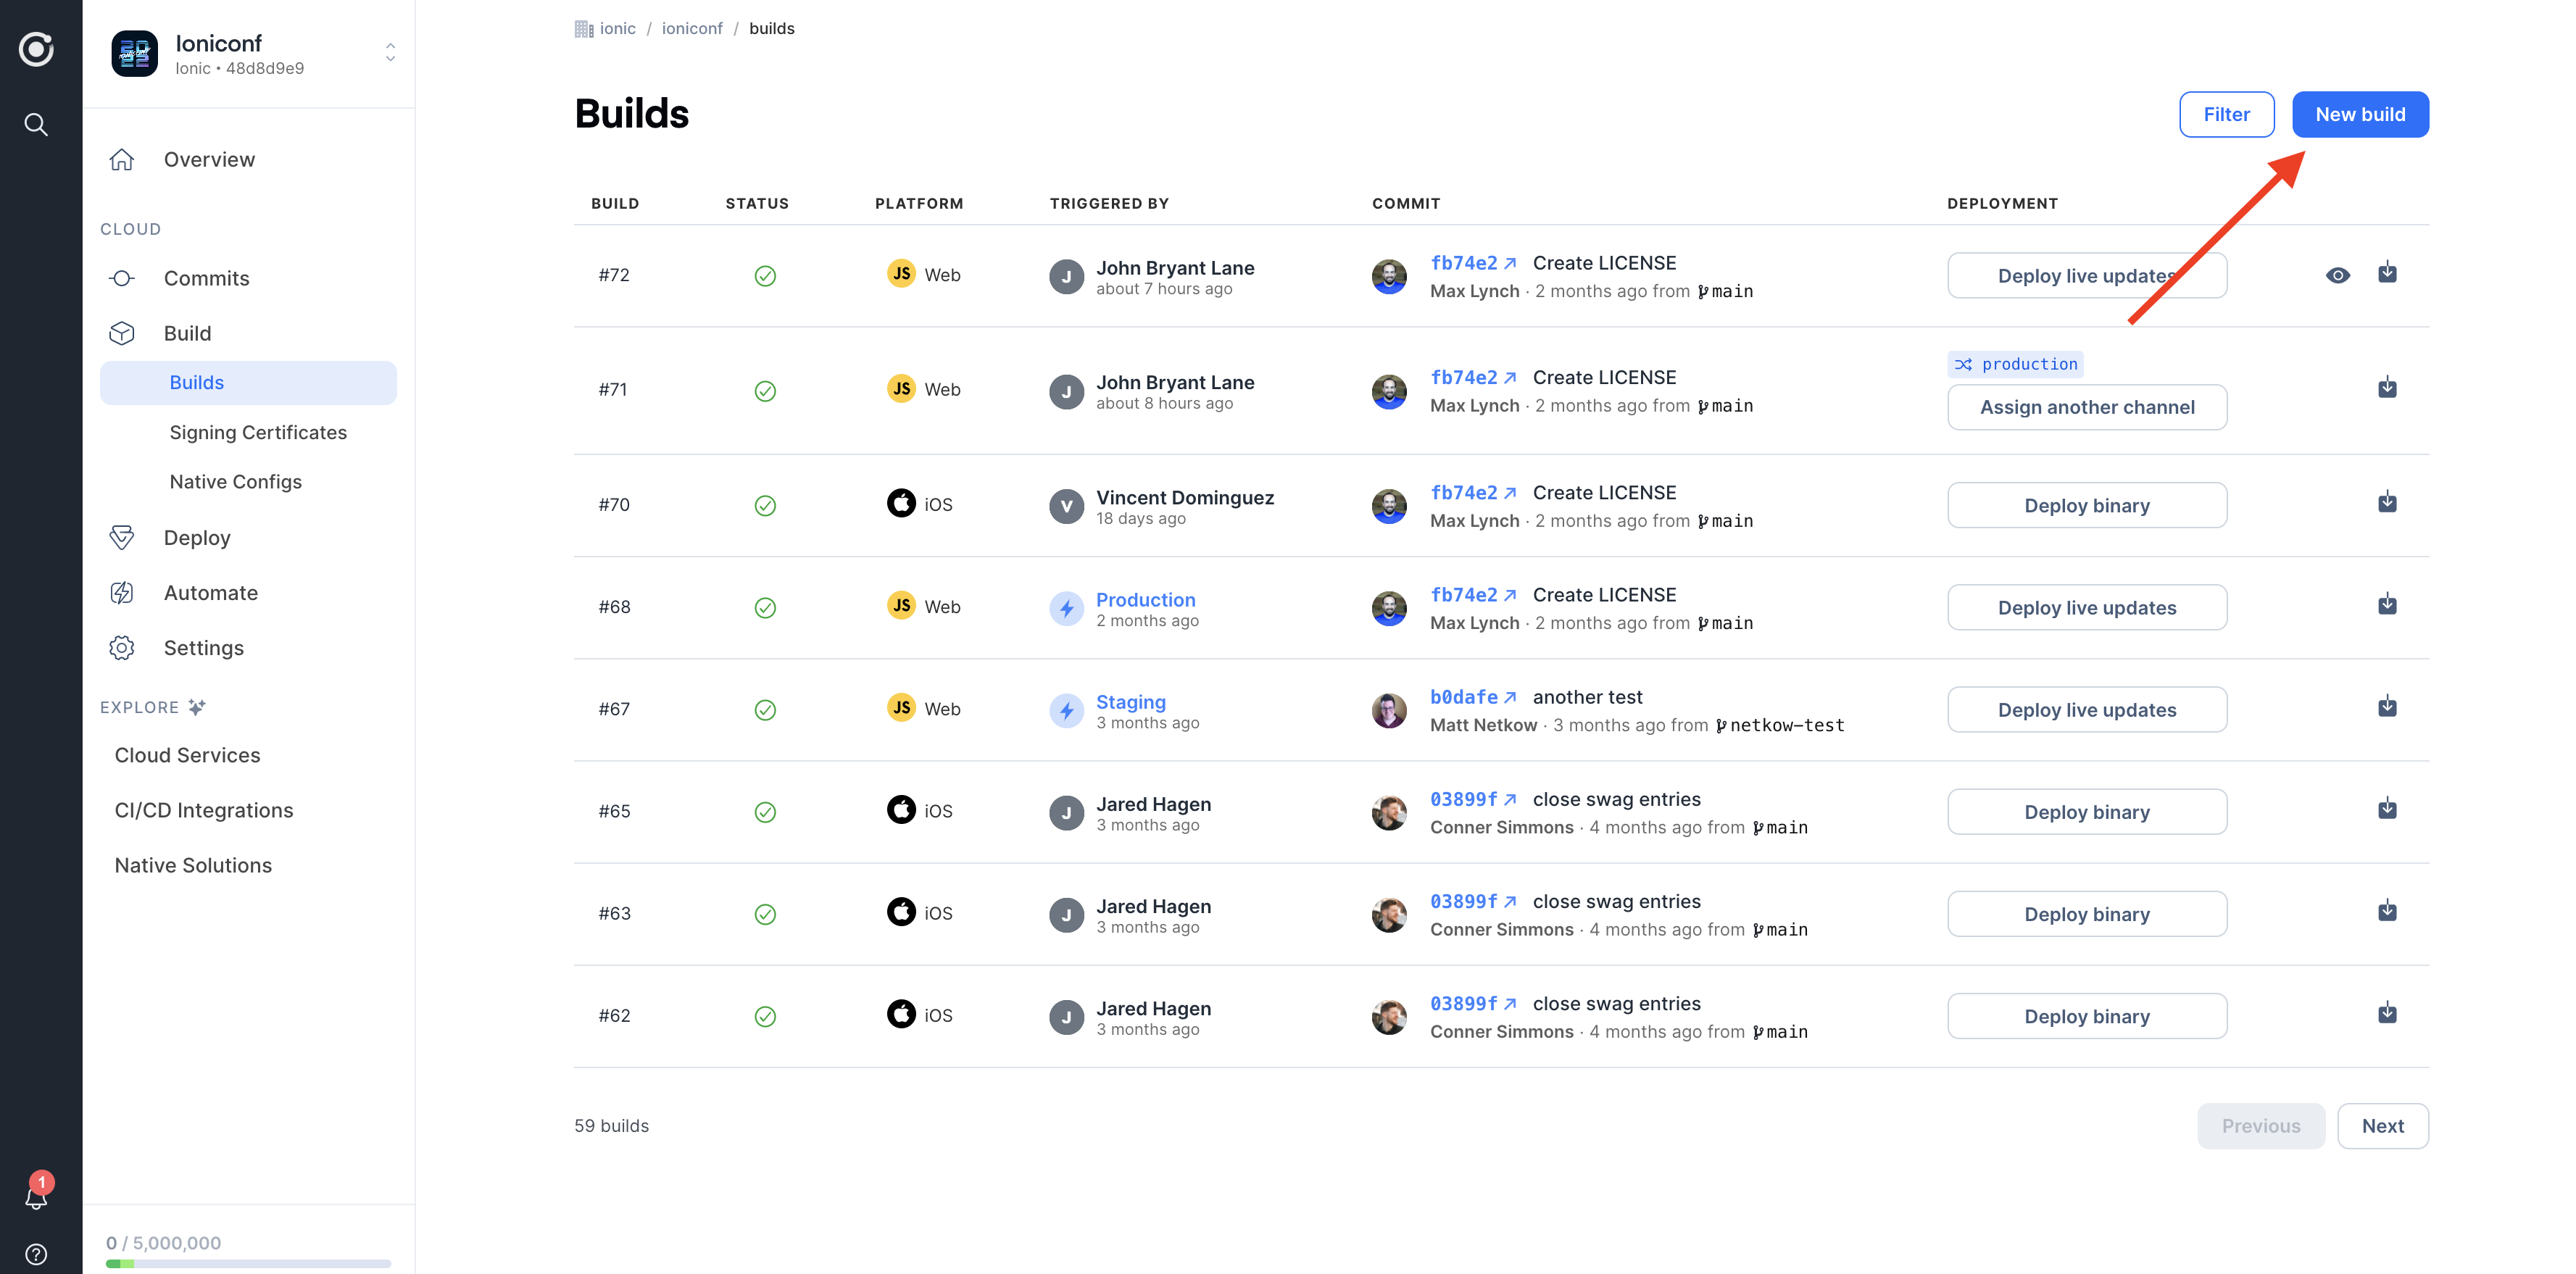
- Click the New build button in the top right from the Build > Builds tab.
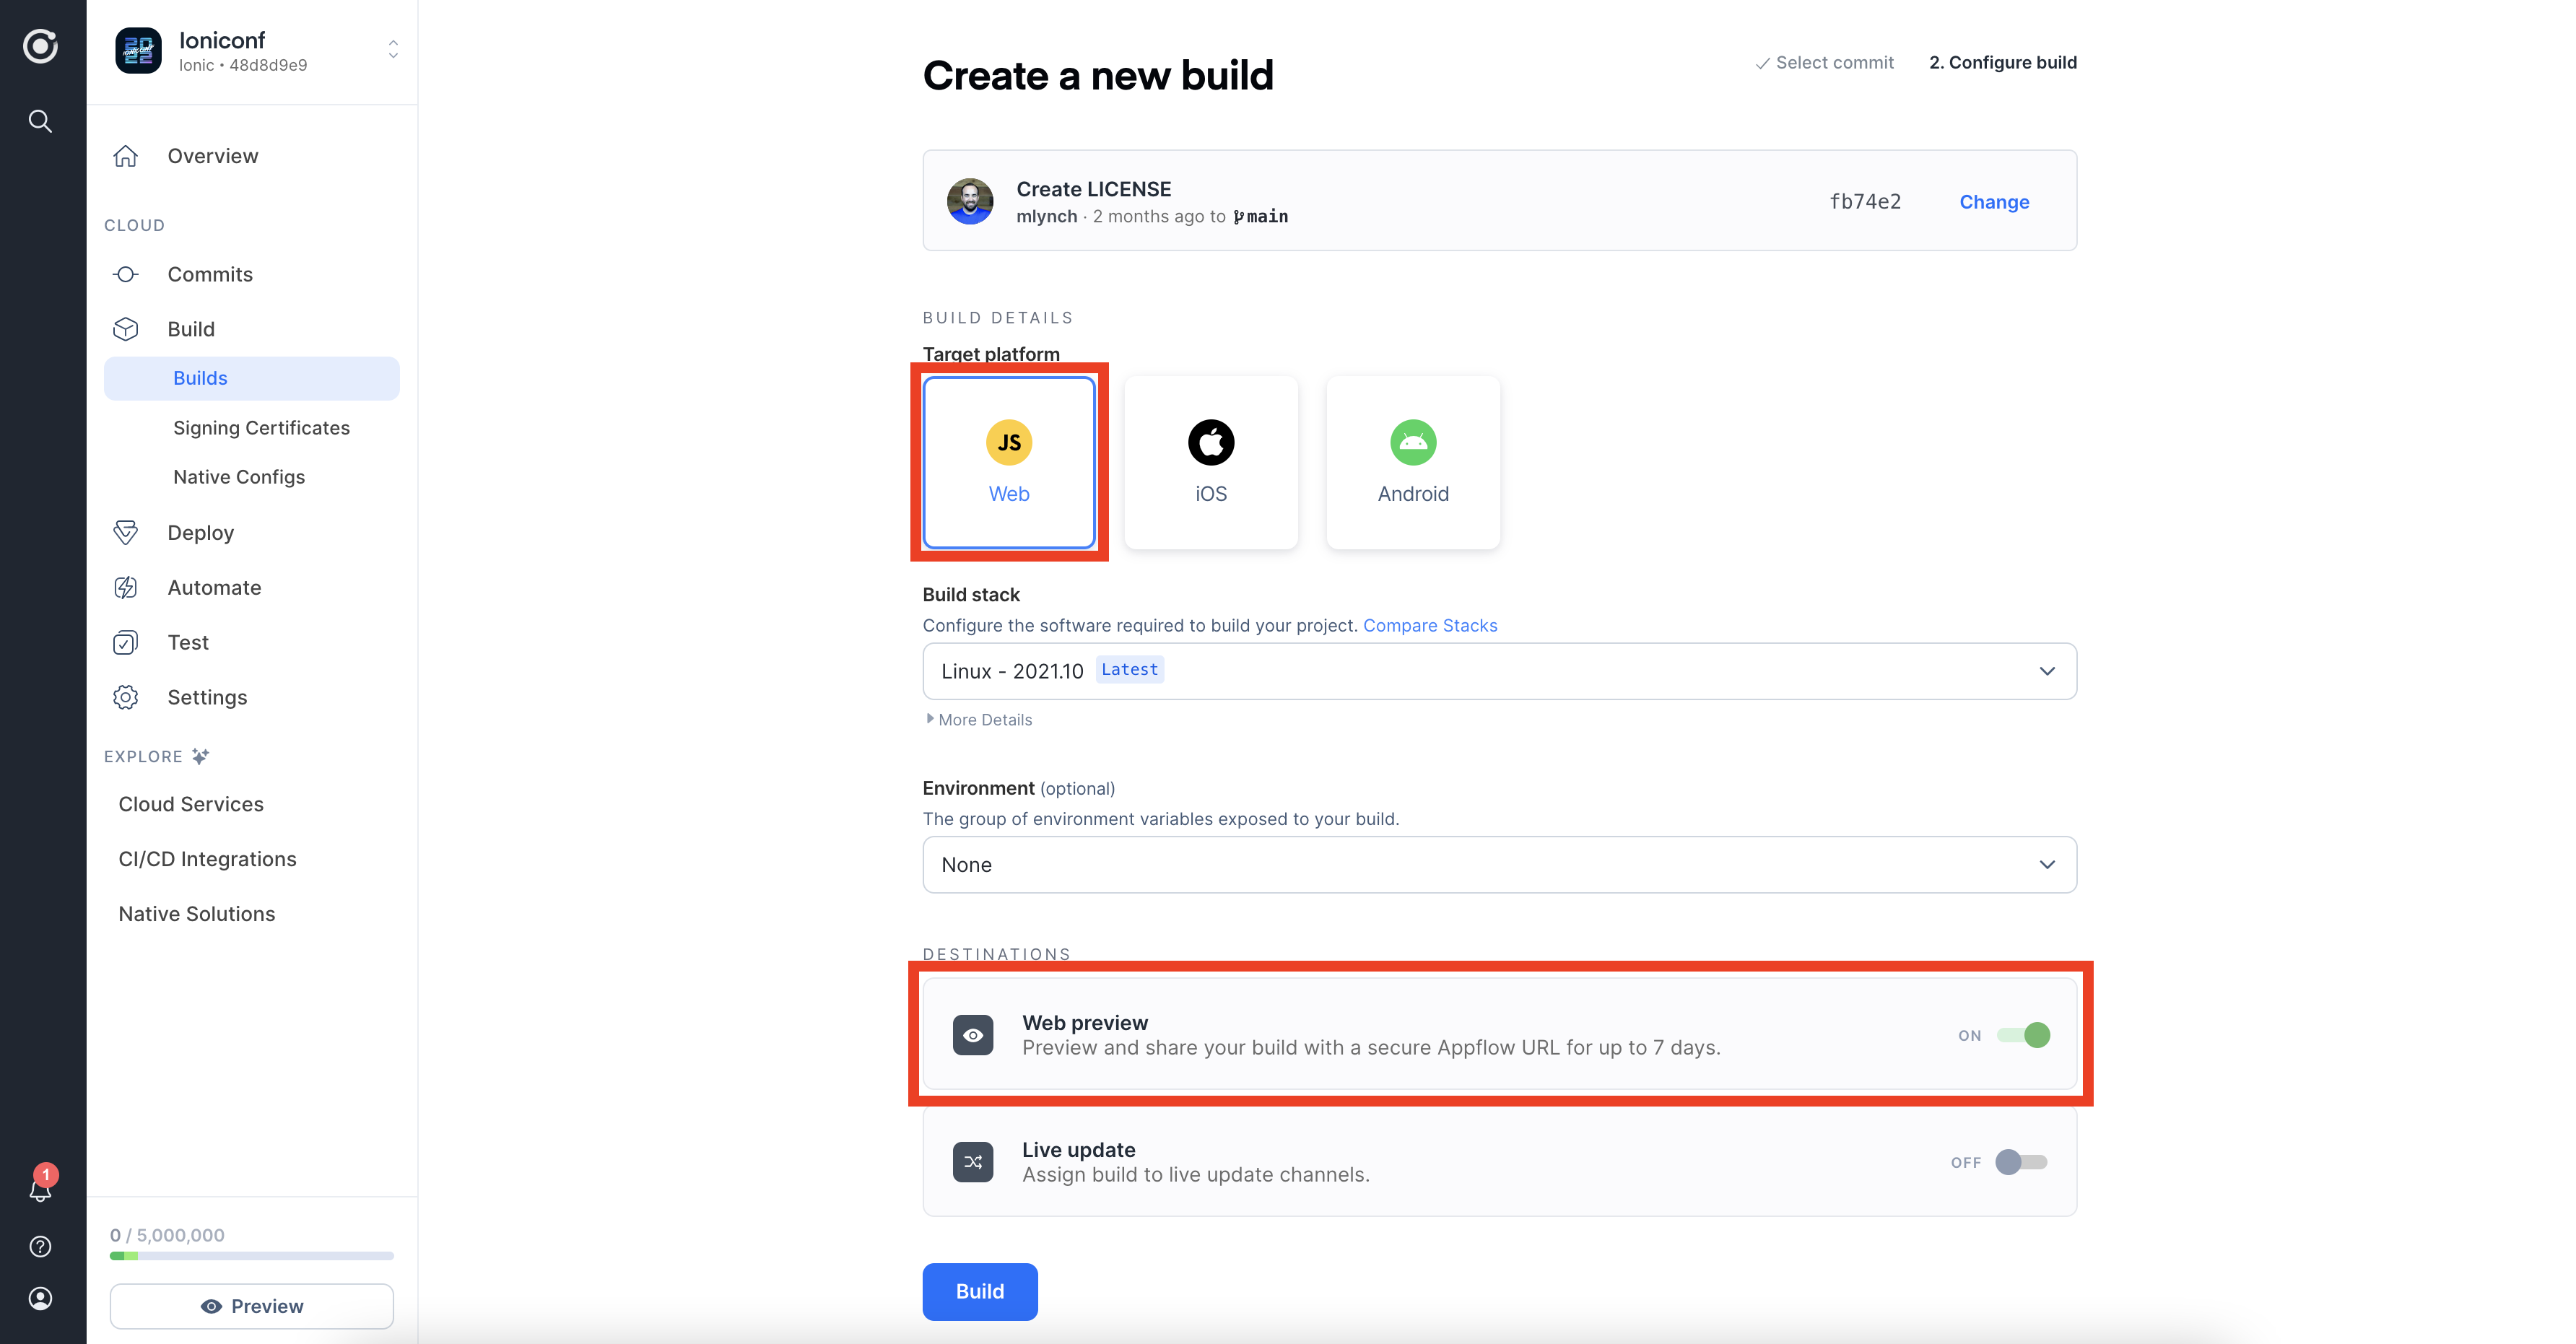
Select the initial commit and then select "Web" as the target platform. Toggle the "Web preview" option so that it's enabled. Next, select the latest build stack.
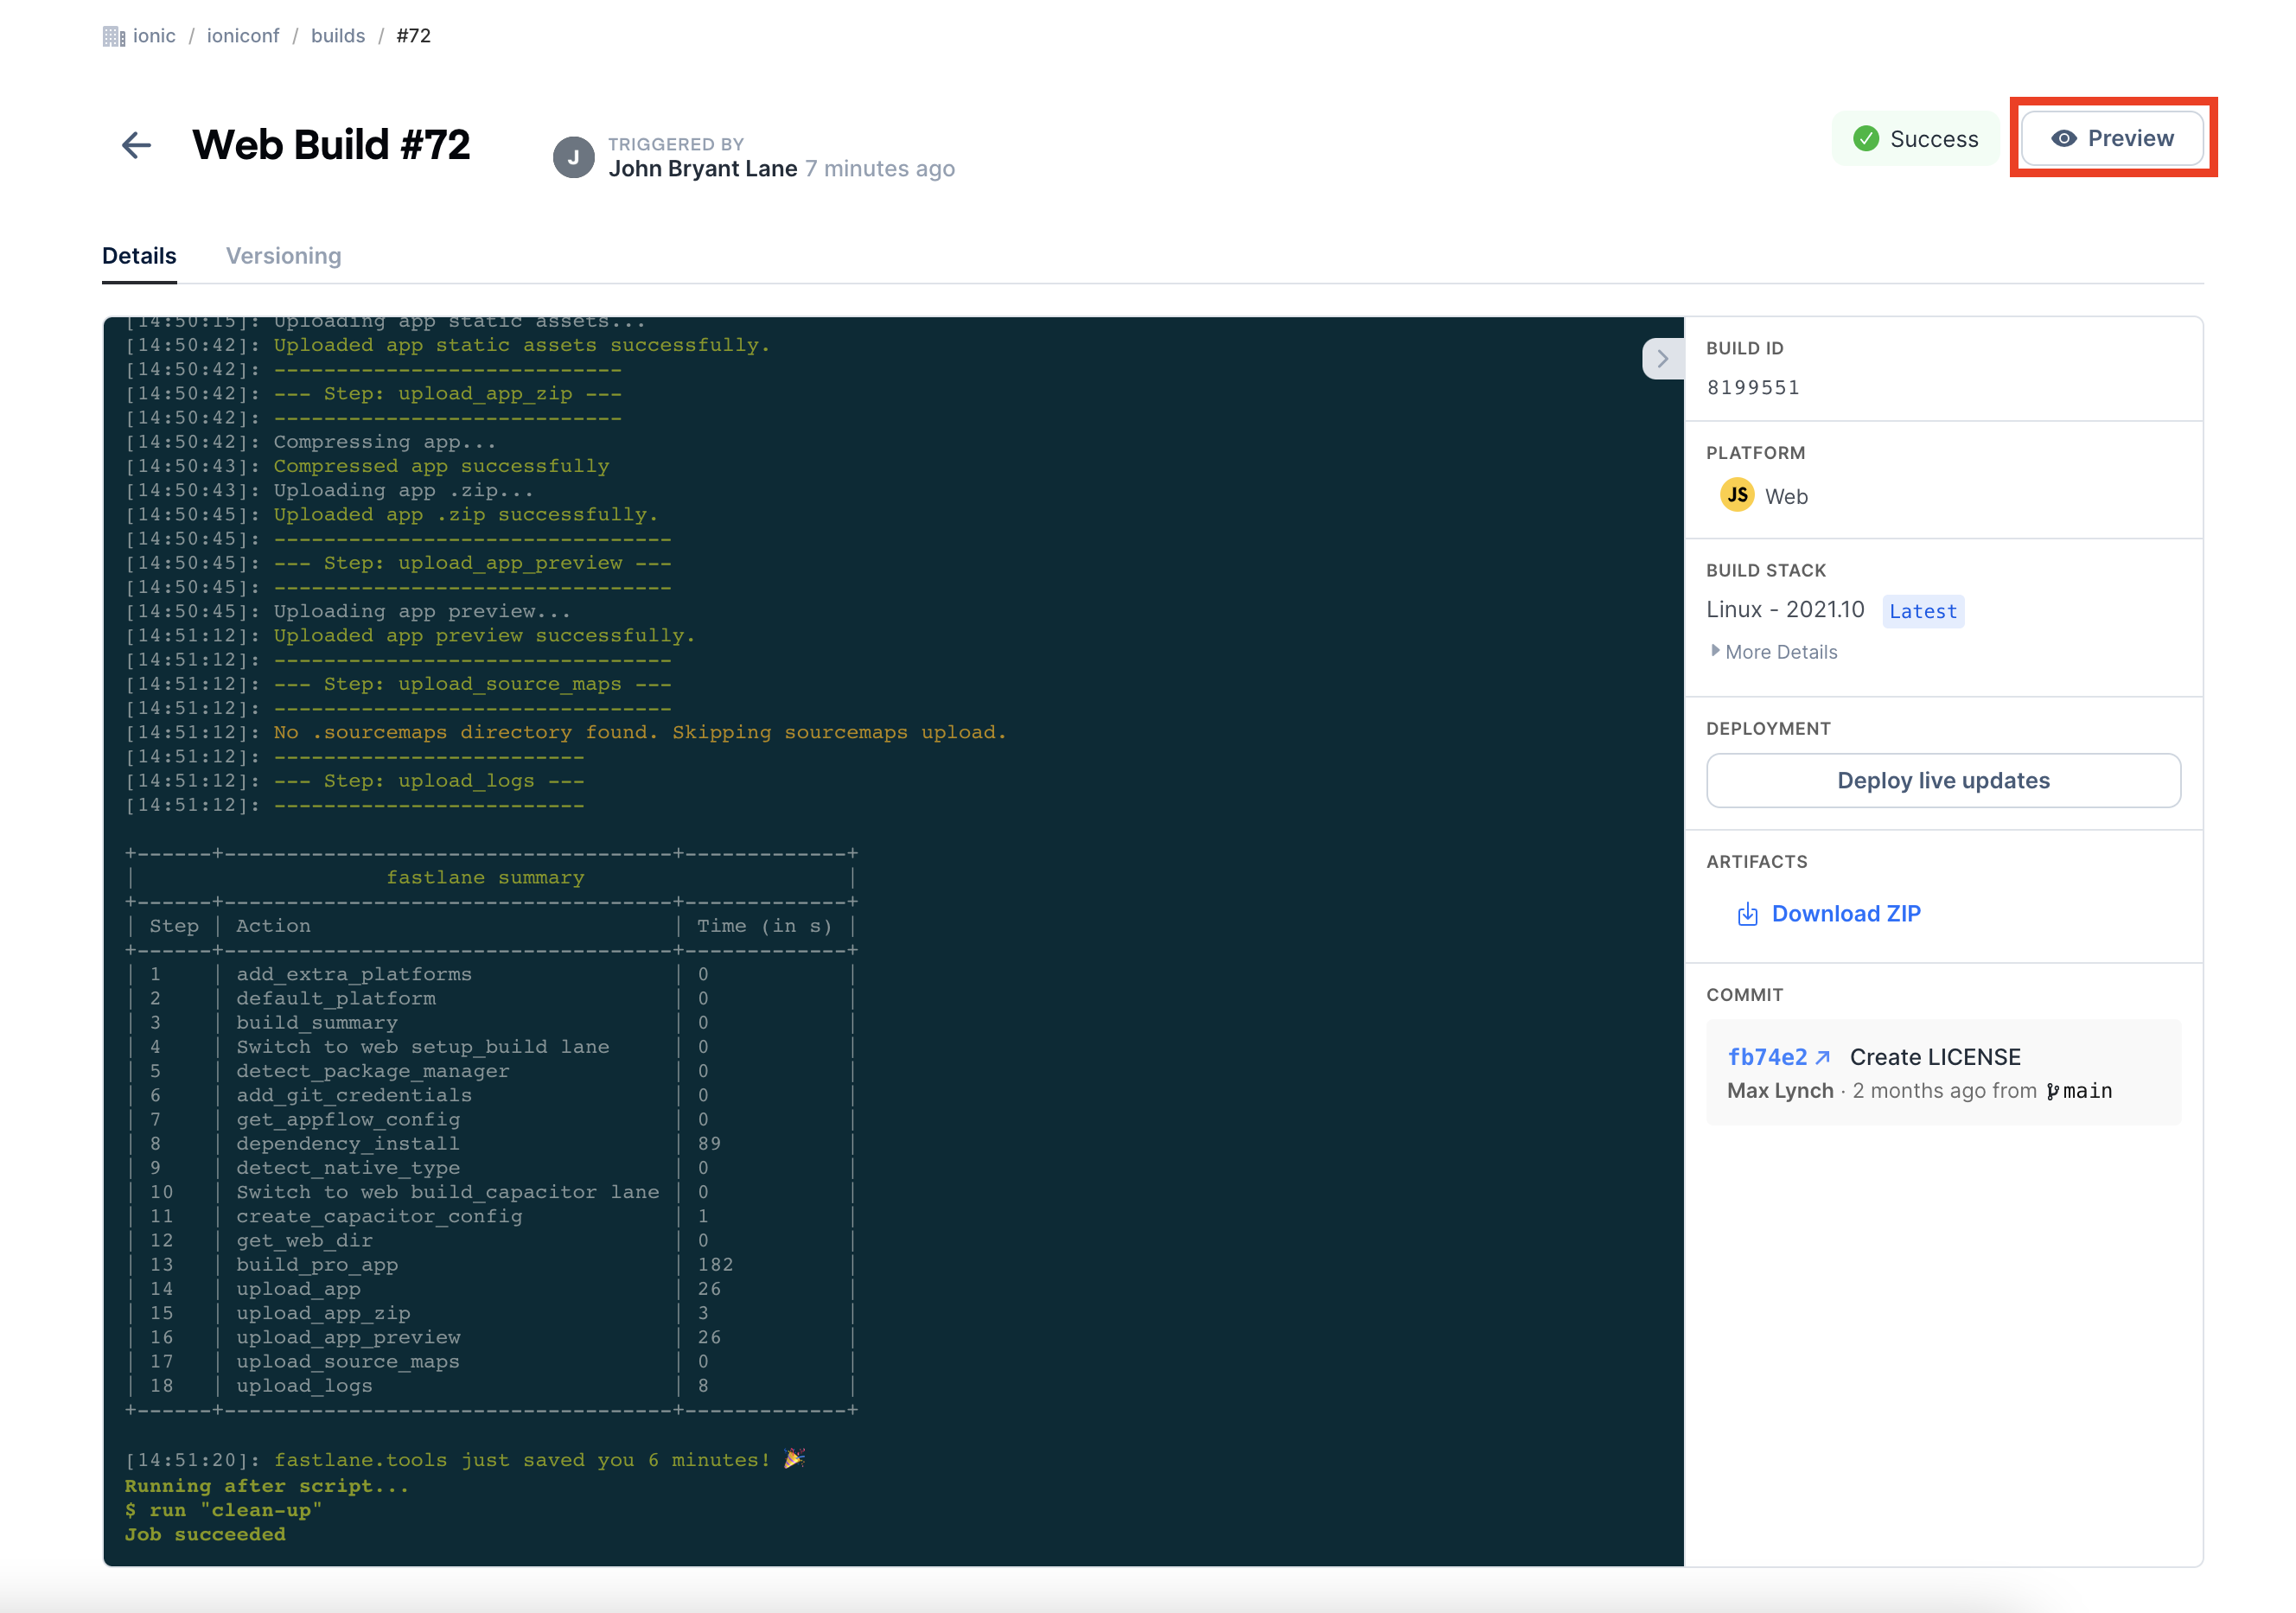
Once you click the Build button, the web build will begin in a new container. You can view the build logs in realtime as your app is being built. This process should take 3-6 minutes. Once the build is successful, you can click the Preview button to view the preview of your starter application.
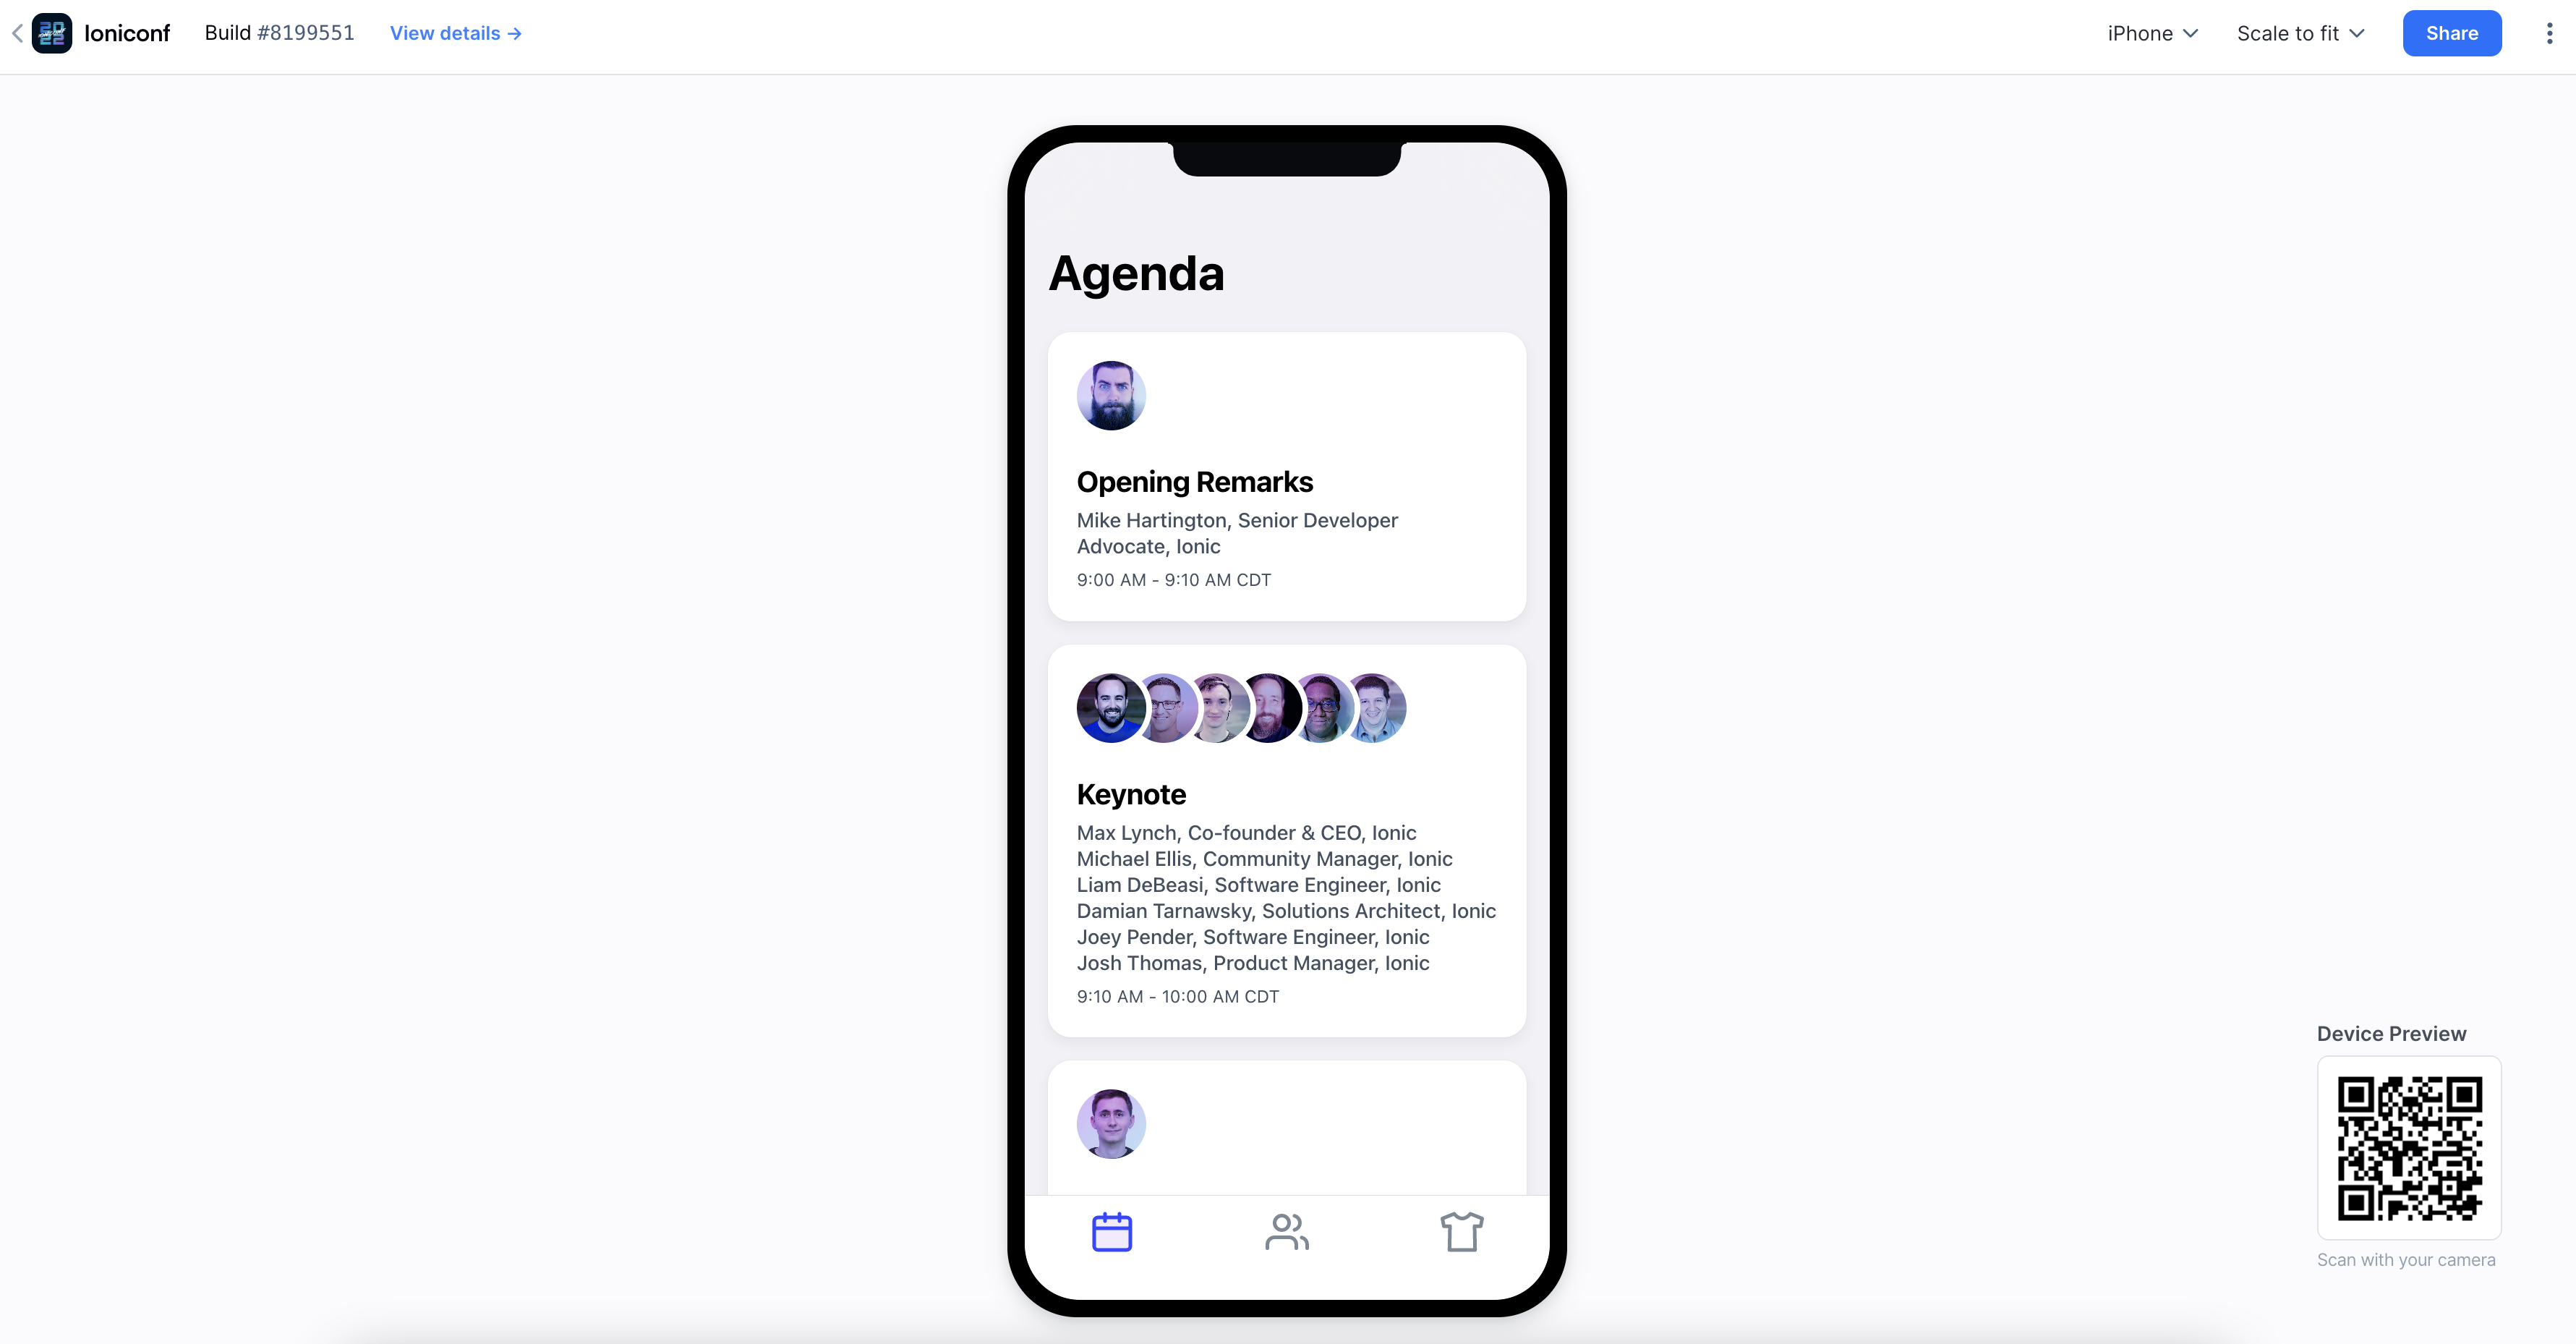
Now, you can see the web preview of your starter project.
Notable Web Preview Features
-
You can share your web preview with ease using the Share button at the top right. This can help expedite the development and design review process.
-
Scan the QR code (bottom right) with any Android/iPhone camera to view the same web preview in your device browser.
To learn about web previews, see here.